Sunset Samurai: Making my first game in Godot.


I've been making games on and off for a few years now with Gamemaker Studio. But when I took on the task of learning Godot and GD script, I found myself overwhelmed.
So, I wrote up 7 key components of programming for video games, and designed a half baked game to facilitate my practice of those components. In this little essay, I will take a look back at that process. This is written assuming two things: that you've spent a couple seconds playing the game already, and that you have at least some (not a lot) experience with making games.
(While you can read this with relatively full understanding coming from any engine, I left some helpful notes specifically for those migrating from gamemaker. If I say something specifically about gamemaker, but it also applies to another engine or programming language, it's because I've only used 3 engines besides Godot: Gamemaker, Scratch, and Stencyl. )
(Also, this was written with skimming in mind, if you read the first sentence of a paragraph and it seems too basic, just skip it. If you're only interested in once section, skip to it. Everything about this post is self contained.)
| < This straight line symbol just means that what follows is a line of code from here on. Also, hashtags are comments within those lines of code.
1. If, else, and else if statements.
2. Get Player Input
3. Draw Images to screen
4. Moving Objects
5. Collision Detection
6. Setting and maintaining variables/ Getting other object's variable values/global variables
7. Drawing Text to Screen
(If the included images are too small, right click and open them in a new tab. That should be better.)
IF, ELSE, ELSE IF
The most common lines of code you'll write. If statements check to see if a case is true, you then write the code to be run in said case. If the case is false, the code behind an else statement is run. However, if you want a bit of nuance, you can you an else if statement, which check to see if another case is true if the first isn't. This isn't a programming tutorial, so I won't go into more detail than this, but the post felt naked without having some sort of explanation.
The best example of my usage of the if statements is in player input, which I will also detail further in the next section. For now, I can simply say that the code looks like:
|if (get_input): do the thing I want.
There are else and elif (else if in gdscript is elif) statements in the game, but they're in collision, and thusly shall also be covered later.
GET PLAYER INPUT
This was a little weird for me to get used to in Godot, but now, I can appreciate it. In gamemaker, there are some built in ways to detect player input, and you can either reference those, or create your own variables manually to reference them. As far as I know, that option doesn't exist in Godot. (At least, it wouldn't be practical in any case I can imagine.)
What you do is go into the project settings, and go to the table titled 'Input Map'.
Input Map
On this screen, you will see a bunch of premade input variables as well as controls for you to use as desired. You can use these, you can hit the + or trashcan icon to change the inputs assigned to these variables, or you can use the input field and add button at the top to create your own. In the case of "Sunset Samurai" I just added the WSAD input options to ui_up, left, right, and down.
(It may be interesting to note that in the original doc, the player had bombs instead of axes, a sword, and a sneak input. All to coincide with the four directional inputs. The only thing that made it into the game unscathed was the kunai. The reason for this was because I pared the game down to only what was useful for practicing coding, not design, and anything more advanced could be left for future projects. I think I will come back to this concept one day and flesh it out to be more interesting to play.)
DRAWING IMAGES TO SCREEN
For this, I'll have to explain how Godot does things a bit. And then I'll get back into the coding.
Everything is a scene. What's a scene? A scene is everything that isn't script. The room is a scene, the player is a scene, the score counter is a scene. Translated from Gamemaker, the closest definition would be 'objects' but that's not quite true because the actual level wasn't an object in gamemaker, nor were the individual sprites. Godot is somewhat more uniform, but not without it's presets.
Gameplay Scenes
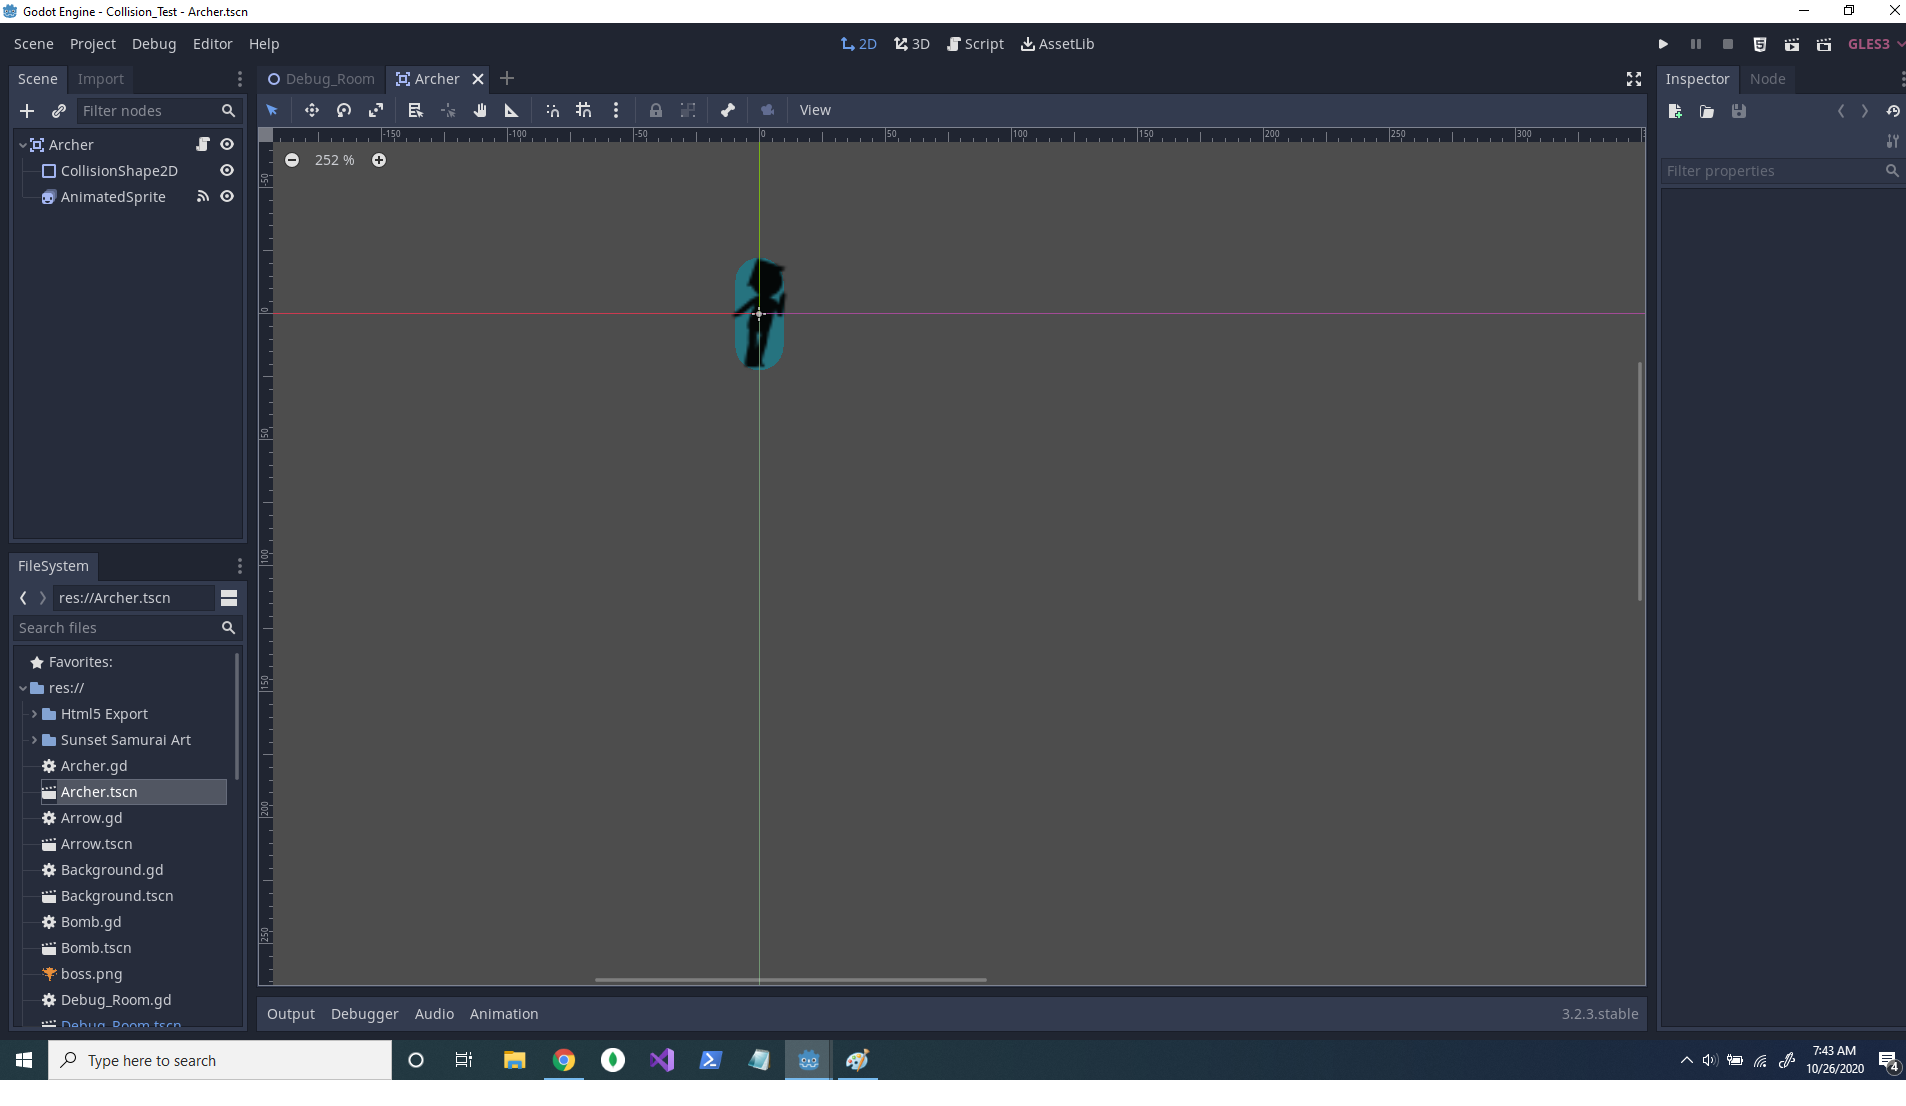
Player Scene in Godot. (It's called archer because the game originally had a different theme, and to change it would be somewhat of a hassle.)
Look at the upper left hand corner of the screenshot, and you'll see under the scene tab, there are 3 things in a list. We are concerned with the first and last items on that list.
Archer - The Area 2D Node
More specifically, scenes are collections of Nodes. The best way to describe nodes for those unfamiliar is like a web of parts that, when combined, produce some comparatively complex parts. Say, for example we are painting. And each color of paint we have is a node. If I take the red node, and the yellow node, and collect them into a scene. The Output would be orange. It's a similar concept.
So the Player and enemies are Area 2D nodes. That just means that they're general objects that take up collision space, but are not effected by physics. (There are other kinds of nodes that could do this same thing, such as a Kinematic Body 2D, and it would do you good to learn what the most common nodes do when making the decision of what your main node in the scene {tree)} is. They each have pros and cons.)
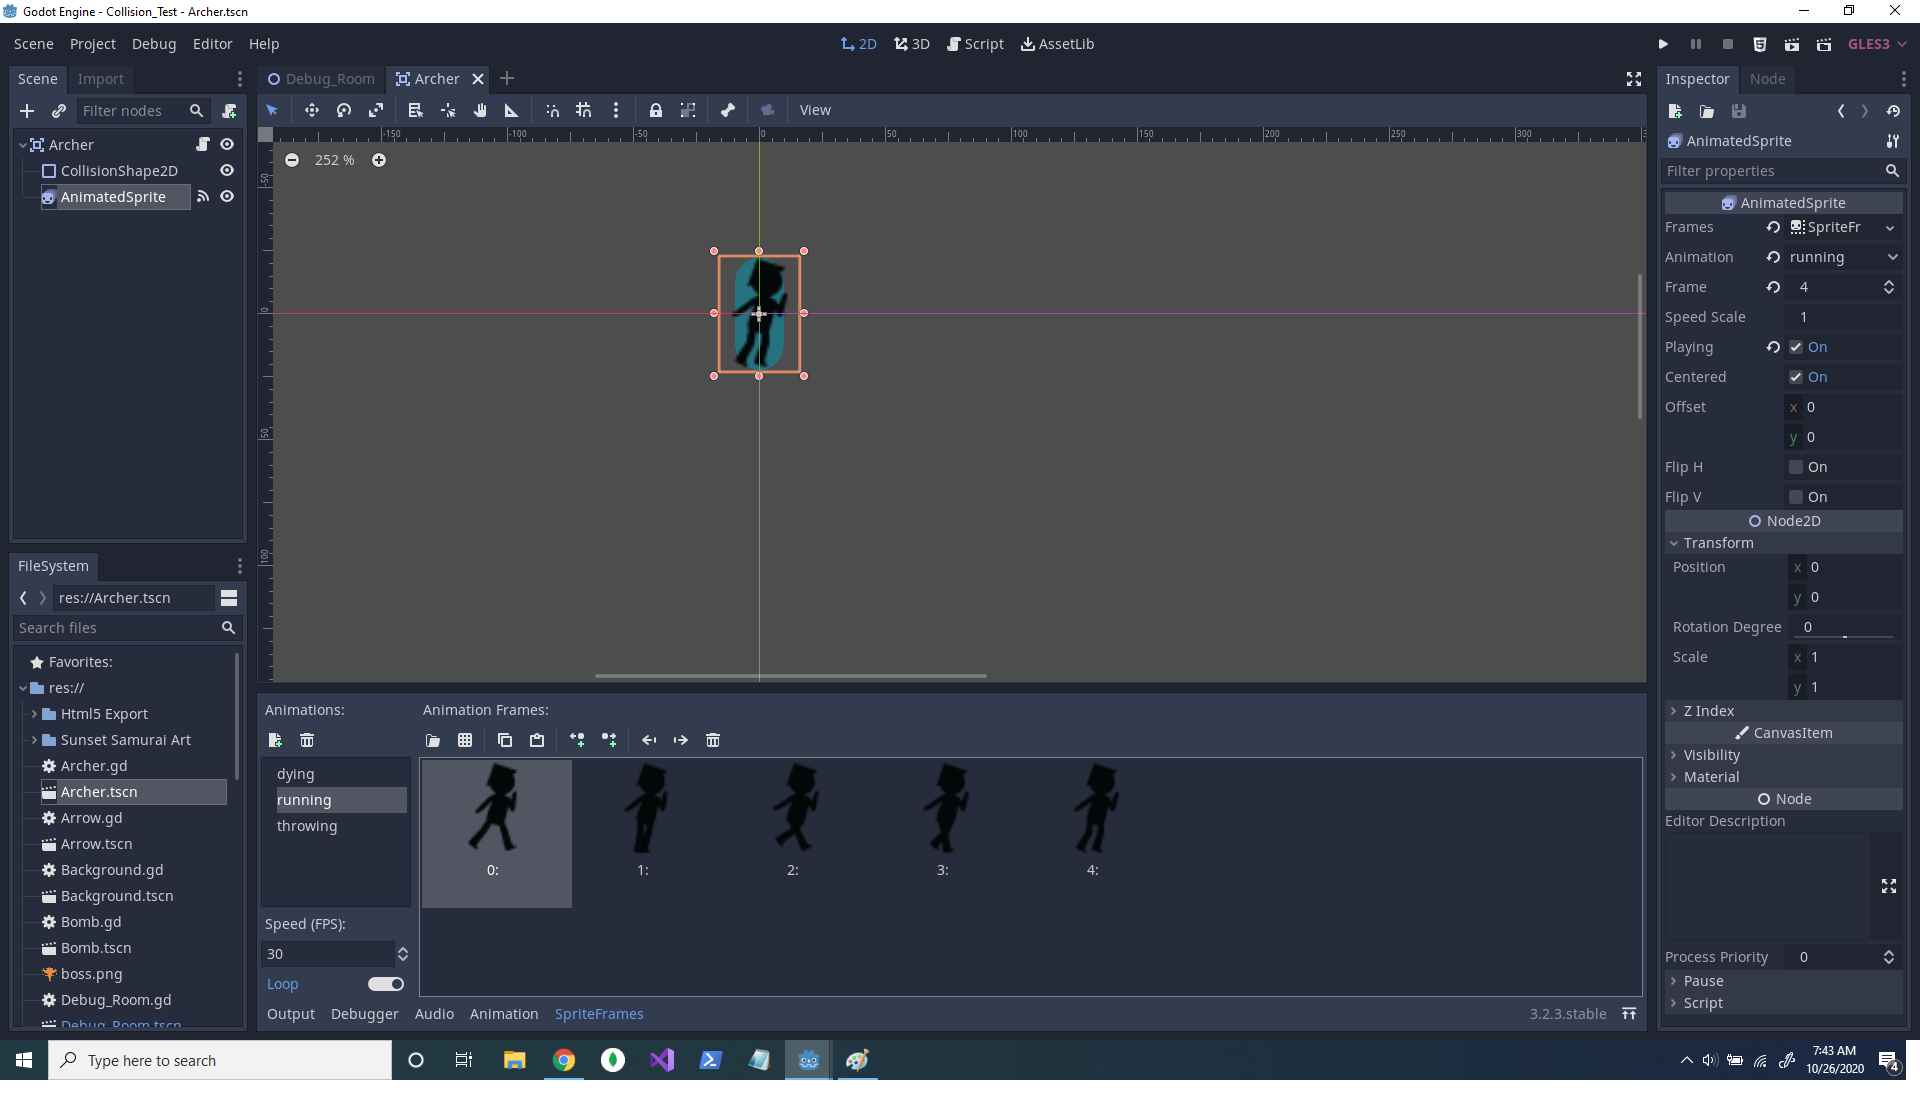
As a child of that Area 2D node, is an AnimatedSprite node. The AnimatedSprite allows me to collect individual images as frames under an animation. But in addition, I can collect multiple animations, name them, and set their individual frame rates, all in one node! To do the same thing in gamemaker, I would have to create multiple sprites, and then change the players sprite in code. To change the framerate, I'd also have to set the image_speed variable in code.
Animations Tab
To load in an animation, go into the AnimatedSprite Node, then on the right side, click the Darkened Box, next to frames, in the dialogue box that comes up, select, add new frames. The Animations Tab you see at the bottom should appear. To load your images, select the folder icon. To add new animations select the icon that looks like a file with a green plus on it. Name your animations and reset the framerate. (The default is 5 so you'll want to do this)
Script
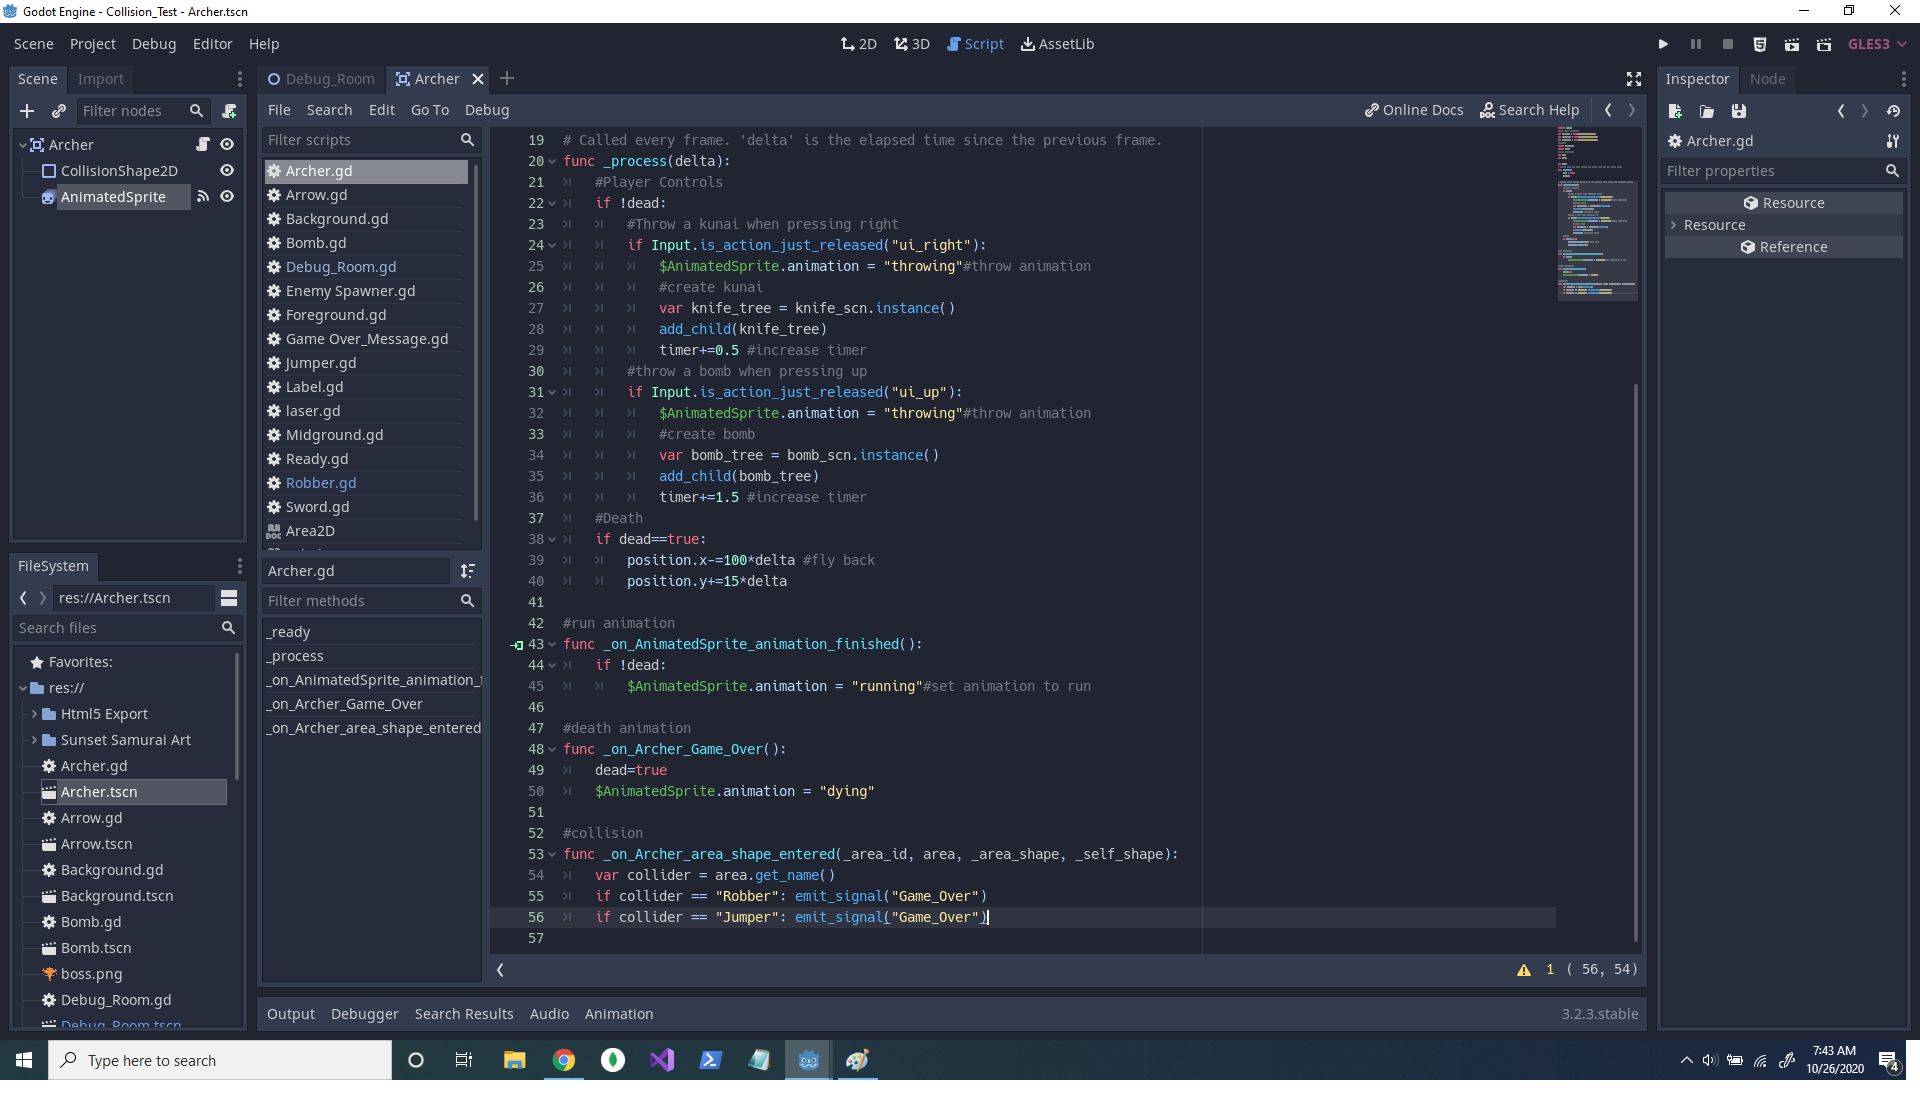
Next, in the script section, you play an animation by calling the AnimatedSprite Node in your code. Here's an example of my Player Input code in full. 
Player Script.gd
Let's break everything in here down. At the top, there's a function called _process(delta). That means that the code inside this runs every frame of the game. And if I multiply my code by the variable delta, it runs every second the game runs. Next, it checks to the if the player is not dead, and only then does it check for inputs. We've gone through getting input before, so we'll glaze over that and look at $AnimatedSprite.animation = "throwing"; this means if I throw a kunai, or of axe, it'll play the throwing animation. Now, look at line 42, commented run animation. Inside of a function that checks if the animation player is finished playing an animation, it checks if you aren't dead, and then it plays the run animation over again.
For some aspects of the animation, I made use of the signals functionality in Godot. I will detail that process more in collision.
Infinitely scrolling parallax background
For scrolling I just followed this tutorial:
But for the parallax effect I took it a step further by adding 3 Texture Rects, and some Haze.
The Scene tree looks like this:
Sky Sprite - The pink gradient you see.
Background Texture - Small Clouds that move slowly.
Haze - This is a transparent, orangy layer, you can barely tell, but if you switch it on and off, the effect it has on depth is actually quite profound.
Midground Texture - Medium Moving, Medium Clouds.
Foreground Texture- Fast Moving, Darker, Large Clouds
The result is honestly the most polished part of this game!
COLLISION DETECTION
This is one of the two parts I had the most trouble with. Not because it's more difficult in Godot than in other engines, because it's actually pretty simple. But because the tutorial I followed lead me to initially emit the wrong signal for the job.
Intro to Signals
What's a signal? Signals are flags that nodes can send out to the other scenes and nodes in your project. And they're the most useful way to communicate between scenes and nodes. The code run in the receiver section only runs once. You can use the built in signals with your node, or you can make up your own signals. (The way I used to do this in gamemaker was by using global variables or by getting the variable directly from other objects. Which isn't bad, those options are still present in Godot, but there are pros and cons to everything, and it's nice to have options.)
To use signals, you first have to connect the signal from the emitting node to the receiving one. To do this you have to open the node tab in the upper right hand part of the screen, right click on your signal of choice, hit connect, then link it to a node of your choosing.
As you can see, this will result in a new function being written at the bottom of your script, as well as green symbol to the right of the line number. This tells you that the signal has been linked. If you try to write in the code yourself, it won't work.
From here, the signals can be more or less treated as if statements in the process function. However, there are certain things you cannot do inside these functions. I don't know them all, but instancing new scenes returns an error. Get around this by using call_deffered.
The actual collision part
The Signal I chose for this task was area_shape_entered (For gamemaker devs, this is the signalmost near to place_meeting). What it does it check if an area is overlapping with the emitters area, and then gets the information on that area. We want this because the normal area_entered signal, only checks to see if the area overlaps, regardless of what it is. (The difference between the two is what caused me so much trouble. So my advice is to spend some time with the documentation and really weigh all your options. You don't have to memorize them, just have a good image of what you want in your mind, and you should find it.) From there is just a bunch of if statements to dictate behavior based on what the collider is.
VARIABLES AND MOVING OBJECTS (SCENES)
There are a lot of ways to do this in godot. I'm pretty sure I picked the simplest, least recommended way of just resetting the position variable. The player itself doesn't actually move, but the weapons, and enemies do. The best example to look at is the axe.
Axe Script
(Again, this is another object that used to behave somewhat differently, that's why it's called Bomb.
I combined these two sections because the example I have works very well for both. But they are still distinct sections.)
VARIABLES
You first initialize a local variable in the area just above the ready function. Model: var age.
Second, you set that variables value in the ready function. (Equal to the Create Event in Gamemaker.) Model: age = 20
Third you can call the variable and do whatever you want with it. Models:
| if age == 20: print("One more year!") (Note: One equals sign is for assigning a new value to the variable. Two is for checking to see what the current value is. Gamemaker was really lenient on this, but you'll have to get it right for basically everything else.)
| if age < 10: # if the age value is less than 10
| age+=1900 #add 1900 to the age value.
| print(age) #write the new age value in the debugger
Global Variables
For global variables, I recommend reading the documentation on autoloads. I'm not really the best at using them yet. But the concept is that you write a script named global, and then load it directly into your project. And then all the scenes can reference them automatically. (For gamemaker users, autoloads also fill in the role of scripts.)
https://docs.godotengine.org/en/stable/getting_started/step_by_step/singletons_a...
MOVEMENT
Take a look back at the screenshot above. In the process function, you'll see that to move, I simply increase the value of the x and y position by the hspeed and vspeed variables respectively.
Now to explain the arc movement. When the axe is first instanced, the vspeed is -200. (Negative is up in programming 2D games.) Now every frame, the axe moves upwards by 200 pixels every second. (This would be every frame, but I multiplied it by delta. The game runs at 30 frames a second, and godot knows this, so delta is equal to 1/30. If your game is 60 fps, delta would be 1/60 and so on.) Next, I increase the vspeed variable, by the grav variable, which lowers the jump height, until eventually the axe moves downward. Finally, I add the hspeed value to the x position at a constant rate. The rotation is just an aesthetic choice.
DRAWING TEXT TO SCREEN
(This is my weakest skill as a programmer. And the next exercise game I make will be the grassroots of a mother 3 clone, because rpgs are made and broken based on their UI. So look out for that post mortem!)
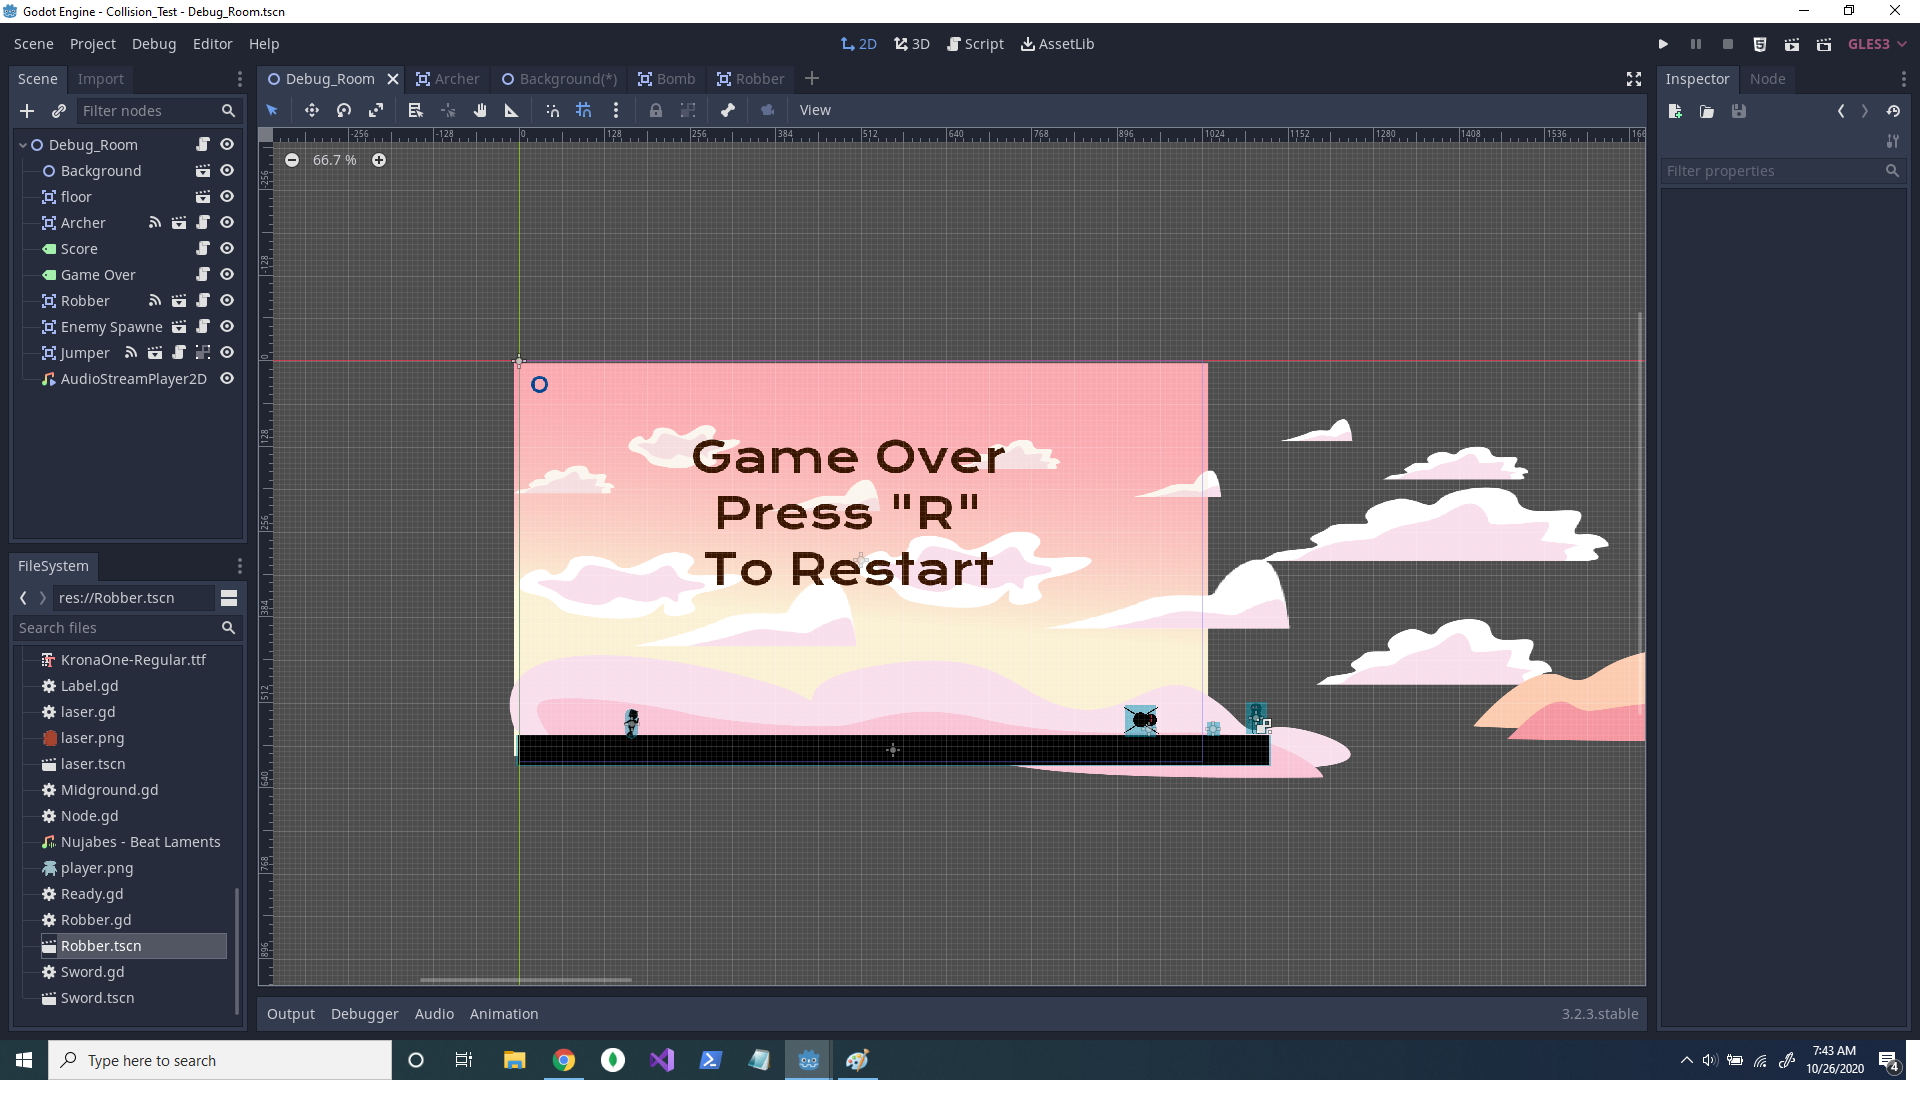
The best example of my drawing text to screen in the game is the Gameover message.
Essentially the way it works is that the GameOver Text is always there. But I hide it immediately, and only show it when the player emits a death signal.
https://docs.godotengine.org/en/stable/getting_started/step_by_step/your_first_g...
I basically just followed this section of Godot's official tutorial for that.
CONCLUSION
So, as you can see, this isn't a step by step tutorial on how to make Sunset Samurai, just a closer look at the most important elements in the process of making it. Which brings me to my 8th tenet:
OBVIOUSLY, THIS IS NOT EVERYTHING, BUT IT'S A GOOD START
Hopefully with this, you can take that step from following tutorials exactly to experimenting with making your own games in Godot. I'm going to include the source folder for the game in the files of this post, as well as link to some more helpful resources I used when making the game. All of these sources are way more reliable than I am when learning Godot, so please check them out. Big thanks to all of them as Well, I couldn't do it without every single one of them!
https://docs.godotengine.org/en/stable/index.html Official Godot Documentation
https://github.com/coppolaemilio/gamemaker-godot-dictionary Gamemaker to Godot Documentation
https://www.youtube.com/channel/UCrHQNOyU1q6BFEfkNq2CYMA Heart Beast also transferred to Godot from Gamemaker and has some awesome tutorials for both engines.
https://www.youtube.com/user/Miziziziz Miziziziz has a lot of different things to offer, in addition to making his own games, he's got some skits, No BS tutorials that I love, and he hosts possibly my favorite game jam, the same artkit jam.
https://www.youtube.com/channel/UC1i4hf14VYxV14h6MsPX0Yw The Generalist Programmer I only watched the one video that I already linked in the main doc, but I assume his other content is solid.
Comments
Log in with itch.io to leave a comment.
Lovely write up.
Thank you!